2010年8月31日星期二

Three Ways to Download Music To Your Zune Player

There are several ways you can download your Zune movies, Zune music videos, Zune MP3's and Zune software to your Zune player.
1) The first is from the Microsoft Zune Marketplace and other Pay-Per-Download Sites which have movie downloads, music downloads, music video downloads, and more. The problem with downloading Zune files from places like Microsoft Zune Marketplace is the cost. The Microsoft Zune Marketplace charges a monthly subscription service called the "Zune Pass" with unlimited downloads for $14.99 per month. The pay-per-download sites charge on the average about $1.00 per Zune download. So, with a Zune player that has a 30 gigabyte hard drive whic allows users to store up to 7,500 Zune MP3s, 2,500 pictures or 100 hours of Zune movies and Zune music videos, that is going to cost a fortune to fill up.

2) WiFi - Microsoft Zune players has a technology called WiFi which allows friends and family to share Zune music, Zune movies, Zune software, pictures and Zune music videos both effortlessly and wirelessly. If you have a cool picture or something you found on a zune download site you can share it easily. Anytime you come in close range of another Zune player you can connect to that Zune player via WiFi and share your Zune downloads. The only drawback is you can only play a shared song only 3 times before it is deleted although, pictures are saved and can be viewed many times. It's a nice feature but needs improvement.

3) The third way is by ripping your music CD's to your Zune player. The definition of ripping means converting CD music files to a file format usable by your Zune player which is either in MP3 or WMA file format. After doing this, all you need to do is plug your Microsoft Zune player into your computer with a USB cable and transfer the ripped music files to your Zune player using the provided Zune software.

1. Put the music CD that you want ripped into your PC.
2. After the media player opens. Select the song you would like to copy and click on RIP.
3. Save the song you just ripped to a folder of your choice.
4. Plug in your Zune Player to your PC using the USB Cable. The Zune Software will automatically search for music that you saved in the folder on your PC. Select the files you want and manually drag and drop them into your Zune player's music folder.

Related theme:
New Zune review part 2-1
New Zune review part 2-2
New Zune review part 2-3
New Zune review part 2-4

Recommended Products:
DVD to Zune Converter
This Zune Converter can convert or rip DVD to what you want video/audio formats.
Zune Movie Converter
It supports convert video to Zune supporting video and audio format.

2010年8月30日星期一

New Thriller Sells More E-Books Than Hardcovers

Weeks after Amazon.com (AMZN) said that it is now selling more electronic books than hardcovers, a leading book publisher said one of its prominent new titles is generating greater e-book unit sales than hardcover unit sales during its first week on sale.

Laura Lippman’s thriller, “I’d Know You Anywhere,” went on sale Aug. 17, and in its first five days sold 4,739 e-books and 4,000 physical hardcovers, said News Corp.’s (NWS) HarperCollins Publishers.

“This is the first book of ours of any consequence that has sold more e-books than hardcovers in the first week,” said Frank Albanese, a senior vice president at HarperCollins. “What we’re seeing now is that if a book gets a good review, it gets a faster lift on the digital side than it does on the physical side because people who have e-readers can buy and read it immediately.”

Ms. Lippman, who has written more than a dozen books, is well-known in mystery circles and has authored four novels that have hit the national best-seller lists.

Read the rest of this post on the original site

2010年8月29日星期日

Google Beat Premieres (Spoiler: Lots of Searches for “Egg Recall” This Week)

Perhaps you reach some Fridays thinking, “Gee, I wonder what the hottest search topics on Google were this week. I suppose I could dig through Google Trends, but wouldn’t it be nice to have some pleasant Google staffer pop on to my screen and breeze through the highlights.” Okay, perhaps not. Nonetheless, the search giant has launched Google Beat as a regular series on YouTube.

View Comments

New Zune2 review (part 2-1) upgrade, hardware, software and Social

When we first caught wind that Microsoft was in fact doing its own portable media player (and then published the first ever photo of the Zune), we hoped it might finally be the play to knock the iPod off its perch. Sure, in mid 2006 there was no shortage of devices more advanced than any given iPod, but then (and now) the iPod enjoyed unchecked dominance of the market in the US and many countries abroad. Steve Jobs knew the day would come that Microsoft would really enter the game.
What we were hoping for was that the portable media world might be in store for another Sony / Nintendo upset. Remember in the 90s how Sony and Nintendo's partnership went awry, and Sony, totally sick of Nintendo completely owning the game console space, brought out the original PlayStation? Before the console's second generation was through Sony had more market share than they knew what to do with. Sony upped Nintendo's game with the PlayStation, then upped their own with the PlayStation 2 -- and took over.
If Sony could do the impossible and topple the infallible Nintendo of old, surely Microsoft, the world's largest technology company, could make at least make a dent in Apple's armor. Yeah, the first-gen product is important, but the second gen product is crucial, because if you can't up your game -- and everyone else's -- you're just another player. This year, Microsoft really had to make the Zune count. Read on to judge for yourself whether they did.
The first generation Zune, as we all know, was little more than a slew of off the shelf hardware and software Microsoft cobbled together in a rush to make a play for the annual holiday gold rush. And the interesting part is, all things considered, it really wasn't bad at all. No one thought it was "done", but it was a lot better than some of the other PMC-based devices we'd seen to date. This year Microsoft brought a slew of new Zune products (and enhancements) to the table, including two new players (flagship 80GB and the flash model), new device software (which runs on all devices), new desktop software, and a new service (Zune Social, a music-oriented social network reminiscent of Xbox Live).

The first generation Zune

Device software
Yeah, we know Microsoft technically skipped right past device software v2.0 and jumped to 2.2, but the update is the best place to start since it affects the most users and devices. Microsoft won some well-deserved brownie points for ensuring all Zune players new and old can run the new firmware, meaning that for now your old Zune will have feature parity with the new hardware.
So here's the deal with the device software: it adds some crucial bits (many of which we expected the first time), takes away some minor but important things, and leaves the other 90% largely unchanged. First, the stuff Zune 2.0 takes away:
Song flagging
The five star rating system
The language menu The good stuff, though, is very good:
MPEG-4 and H.264 playback support
Podcasting support
Sync over WiFi (which we'll get to later)
In terms of performance, both old and new hardware and firmware were almost identical in testing. A lot of people have been claiming the new firmware is much snappier, but we didn't find that to be true at all. Two Zune 30 devices boot up within a half second between 1.0 and 2.0 series firmwares, and the flash-based Zune 8 we tested booted to home screen less than a second faster. Traversing menus took no more or less time or when syncing and the like. (Note: scrolling through long lists appears to happen slightly faster, but that's likelier an interface tweak, not a performance increase.)

Related theme:
New Zune review part 2-1
New Zune review part 2-2
New Zune review part 2-3
New Zune review part 2-4

Recommended Products:
Aiseesoft DVD to Zune Suite
It can help you convert DVD, IFO and all video formats to Zune, Zune 2 MP4, WMV and Zune supported audio MP3, WMA, and AAC etc.

2010年8月27日星期五

How to watch and play Internet videos on iPod touch and iPhone(3G)

Why do iPod touch and iPhone(iPhone 3G) can not play internet video besides youtube? The reason you can't view videos from other videos sites besides youtube is that they run on something called "Flash". iPhones and iPod Touches can't support Flash because of their software. This is why Apple created the YouTube application on your home screen.
Luckily, someone has done their best to fix this problem.
iTransmogrify! is a bookmarklet for iPhone and iPod touch which transforms embedded Flash content into direct links to natively supported formats. That means YouTube videos and MP3s can now be played from the iPhone's Safari web browser with just a few clicks. The iTransmogrify! bookmarklet recognizes and converts a variety of embedded Flash content from web pages so they will play on iPhone and iPod touch.
Currently supported formats include: YouTube, embeds and YouTube pages, Blip.tv, Revver, TED talks and embedded TED talks, Many embeded flash MP3 players ,Kink.fm podcasts, Flickr badges (videos are unsupported) , The Test Suite has more sites.
To install the bookmarklet, just drag the link to your Safari or Firefox Bookmarks, IE users should right click and choose “Add To Favorites” After adding the link, sync your iPhone or iPod touch.

play internet video on iPod touch, play internet video on iPhone

Grab it now: iTransmogrify!
You can also add iTransmogrify from your iPhone!
Then, whenever you find a broken video, just select the bookmark to convert it.
Now, you can watch and play internert videos such as Blip.tv, Revver, TED talks and embedded TED talks, Many embeded flash MP3 players, Kink.fm podcasts, etc on iPod touch and iPhone.
More information, source code and bug-tracking is available on the iTransmogrify Google Code page.

If you want to watch your own videos on iPod touch or iPhone, you can follow this step by step guide: How to convert all video files and extract audio from video on Mac OS X ?
If you want to play dvd movie on iPod touch or iPhone, you can follow this guide: How to rip DVD to all sorts of video and audio files on Mac OS X?

Recommended iPhone 3G Software Links:
DVD to iPhone 3G Converter for Mac
DVD to iPhone 3G Converter for Windows
iPhone 3G Video Converter for Mac
iPhone 3G Movie Converter for Windows
DVD to iPhone 3G Suite for Mac
DVD to iPod touch converter for Mac

2010年8月24日星期二

How to backup DVD movies to DVD for free

This is a tutorial that explains the process of backing up a DVD on a PC using DVD Shrink. While there are many software solutions for backing up DVDs, the one on Windows I like is DVD Shrink. On Mac OS X, I like this DVD Copy for Mac.

that can copy DVD movie (D9 to D9, D5 to D5) with the entire movie in 1:1 ratio perfectly. This tutorial will be a concise explanation of how to backup DVD movie to DVD for free. There are many reasons to make a backup copy of DVDs one has purchased, keep reading to learn how to improve the quality of your re-encoded backups.

Step 1, download DVD Shrink
You can download DVD Shrink from: http://www.DVDshrink.org/.
For Mac users, you can download the DVD copy for Mac from here.

Step 2, Run DVD Shrink and insert your DVD movie into the DVD drive
The first thing you will need to do is open the disc. Click on "Open Disk" at the top-left of the program window. A small window will pop up. There is a drop down menu - select the drive and disk that you are going to backup. Then click OK. When you click OK, the DVD will be “analyzed”–this process will last for 1-3 minutes, then DVD Shrink will “suggest” a level of compression.

back up DVD - insert DVD movie

If you receive an error while trying to rip the DVD (like the one shown in the screenshot above), you will need to use another program such as DVD Decrypter to copy the DVD files off of the disc on to your hard drive. You need to minus the copy protections first. Click here to read how to use DVD decypher to minus the copy protections of DVD.

DVD decypher

Step 3. Adjust compression for individual Titles (optional).
DVD Shrink will automatically select the highest possible quality settings that will fit on your disc. You could accept the settings that DVD Shrink chooses. You can also increase the quality of the main movie file by reducing or eliminating other video and audio files on the DVD.
Many modern DVDs will contain bonus footage, trailers, multiple surround sound modes, and other settings that one can reduce or eliminate to improve the quality of the main movie feature.
The main movie quality setting is reported to the left of a slider bar in the top right of the screen. In the screenshot below we see that the default setting requires that the main movie be compressed to 48.2% of its original level to fit on the disc. You can increase this percentage to improve the final quality of the backed-up DVD. But the output file will be larger.

backup DVD Movie - setting

The way in which one goes about improving the quality of the main movie will be different depending on your specific needs. For example, when “Dolby Digital” and “DTS” 5.1 audio tracks are available, you can remove “DTS” (to save hundreds of megabytes), you can also choose to preserve “DTS” and reduce or eliminate other items from the DVD.
Some of the settings I made to this particular DVD were:
--Removed “5.1-ch French” audio track (went from 48.2% to 55.4% compression for main movie).
--Replaced certain Titles with “Still Image” (keep reading for more on this).
To improve the quality of the main movie, you'll need to reduce or eliminate other DVD features, each called a “Title” in DVD Shrink. Click the “plus sign” next to “Extras” in the menu to view the other titles.

DVD Shrink

The Title I've selected below was 72MB. In this case the video was a “behind the scenes” feature that I did not wish to keep. Since one cannot completely remove any of the “Titles,” the next best thing is to replace them with a still image. In order to do this, select the title you want to replace, and choose “Still Image” from the drop-down menu in the top right. In this case the file went from 72MB to 66MB. The still image is configurable, simply drop an image of your own into the aptly named Still Images directory found under Program Files > DVD Shrink.

Step 4, Burn the re-encoded files to disc.

burn file

Click “Backup DVD” and Now select the folder where your temporary files will be saved. DVD Shrink needs to save a bunch of files on your computer (that actually compose your movie) so that it can burn that movie back onto another DVD. This is why you had to clear 5 gigs of space on your hard drive. Once the DVD backup has been burned, you can go ahead and delete these temporary files (the program does not do this itself).
You may as well select “Region Free” (default) under the DVD Region tab.
on the Burn Settings tab make sure “Maximum” burn speed is selected in the drop-down menu.
Once you have the settings the way you like them, begin the burn process. You'll see the “Encoding” happening first. There is a video preview that will show you where you are, but I believe that the encoding process goes slower with this setting enabled.

burn DVD movie - Encoding

Once the files have been copied to your hard drive, your original DVD movie will eject from your computer.
You will also have a pop up asking you to put a blank DVD into the DVD burning drive of your computer that you previously selected.
Exchange the original DVD movie for a blank, burnable DVD. Push the blank DVD into the drive. DVD Shrink will begin burning the new DVD automatically in a few seconds. Now you will get a pop up that shows the progress while the program burns your new DVD movie. Once the new DVD has been burned, you will get a window that tells you that it's done. Click OK, close the program, and take your new DVD movie backup. All Done!

Note: DVD Shrink is only for PC users. If you are a Mac user, Please download DVD copy for Mac .

China Unicom Has iPhone 4 Antenna Issue Covered

What’s the Chinese word for Antennagate?

There isn’t one and there isn’t going to be one if China Unicom can help it.

Sources at the carrier tell Caixin that when Apple’s iPhone 4 debuts in China on September 16, it will be sold with a complimentary case, presumably intended to head off the death-grip drama that troubled the device’s launch in the States and ultimately forced Apple to give out free cases to all iPhone 4 owners and extend a liberal return policy.

2010年8月22日星期日

The Newsonomics of the FT as an Internet Retailer

Back in 2002, the Financial Times took a radically different path than most of its news publishing peers: It decided to charge its online readers to access its content. Flash forward eight years, and the FT model — a metered model — is the one many publishers are eying and beginning to test.

Read the rest of this post on the original site

Mark Hurd “Left HP in Great Shape” With “Winning Strategy”

How’s HP doing without former CEO Mark Hurd?

Just fine, apparently. Asked what sort of state Hurd left the company in during a media call Thursday afternoon, Cathie Lesjak, Hewlett Packard interim CEO, said it was good. “Mark Hurd left our organization with an extremely strong strategy and a talented management team that’s excited to execute on it,” she said. “He left HP in great shape. We think of ourselves as a team on a mission….When you have a winning strategy, I don’t see motivation to change it. It’s something we’ve been building for the last few years. It’s a well-thought-out strategy that’s working very well for us.”

Meanwhile …

2010年8月20日星期五

How to convert MTS, TS, M2TS Video to HD video, MP4, WMV, AVI

Record everything around you and share with the world/friends/family is becoming more and more popular among young people. Get a HD Camcorder is necessary and also how to share is really important. I think you can use youtube.com, make a DVD and so on. As the video you record on your camcorder is MTS, TS, M2TS or other HD video format, so you have to convert them into normal video format to edit.

Today I will share with you how to convert MTS, TS, M2TS video to normal video formats.
You need 3 nice tool to do it: MTS Converter, TS Video Converter, M2TS Converter.

Part 1: How to convert MTS video
Step 1: Load Video
Click "Add File" to load the video that you want.

MTS converter

Step 2: Choose Your Output Profile and Settings
From "Profile" drop-down list you can choose your output profile according to your need.
For example, if you have a iPod and you want to convert video for it, you need to choose "iPod" from the profile list and then it also provides the second chance to specify your iPod generation.
You can also click "setting" adjust the settings of your output video, such as "video/audio encoder", "Video/audio Bitrate", "Channels", "Resolution" and so on..

Step 3: Video Editing
This powerful MTS Converter allows you to do many video editings.
1. Click "Effect" to make special effect for your movie.
You can adjust the "Brightness", "Contrast", "Saturation" and also you can use "deinterlacing" to improve you output effect.

effect

2. Trim:
"Trim" function allows you to pick up any part of your video to convert. You can just convert a part of your video that you want.

trim

3: Crop:
Cut off the black edges of the original movie video and watch in full screen on your iPod using the "Crop" function.

crop

Step 4: Conversion
After you have done all the steps above you can click "Start" button to start your conversion.

Part 2: How to convert TS video

TS video converter

Step 1: Load Video
Click "Add File" to load the video that you want to convert.

Step 2: Choose Your Output Profile and Settings
From "Profile" drop-down list you can choose your output profile according to your need.
You can also click "setteing" adjust the settings of your output video, such as "video/audio encoder", "Video/audio Bitrate", "Channels", "Resolution" and so on..

Step 3: Conversion
After you have done all the steps above you can click "Start" button to start your conversion.

Tips: Video Editing
This powerful TS Converter allows you to do many video editings.
1. Click "Effect" to make special effect for your movie.
You can adjust the "Brightness", "Contrast", "Saturation" and also you can use "deinterlacing" to improve you output effect.
2. Trim:
"Trim" function allows you to pick up any part of your video to convert. You can just convert a part of your video that you want.
3: Crop:
Cut off the black edges of the original movie video and watch in full screen on your iPod using the "Crop" function.

Part 3: How to convert M2TS video

M2TS converter

Step 1: Add File
Load your M2TS video.

Step 2: Choose Profile and Settings
Select your output profile according your need and adjust the settings of your output video if you like.
(the default setting works well)

Step 3: Start Conversion
Click "Start" to begin your conversion.

2010年8月17日星期二

How to convert DVD, Movie, Music to iPhone ringtone and put ringtone on iPhone, iPhone 3G

Everyone wants his iPhone ringtone to be personalized,and sometimes want to make iPhone ringtone from a clip of their favorite DVD, movie or songs. Here I found a easy way to achieve this target for iPhone ringtone, hope it helpful.

The tools you need are Aiseesoft DVD to iPhone Suite and iPhone PC Suite (free), download links are as following:
Aiseesoft iPhone Converter Suite:
http://www.aiseesoft.com/downloads/dvd-to-iphone-suite.exe

iPhone PC Suite (Totally free)
http://www.free-codecs.com/download/iPhone_PC_Suite.htm

Note: iPhone PC Suite has to run under Microsoft .NET Framework, you can download it from: http://www.microsoft.com/downloads/details.aspx?FamilyID=333325fd-ae52-4e35-b531-508d977d32a6&DisplayLang=en

The iPhone ringtone guide is composed of 3 parts:
1. How to extract audio to ringtone from DVD?
2. How convert audio and video to iPhone ringtone?
3. How to sync/ put ringtone to iPhone without iTunes

Part 1 How to make iPhone ringtone from DVD?
Install Aiseesoft DVD to iPhone Suite and run it. For Windows Vista user, you may have to run this program as Administrator, right click the program shortcut and click “Run as Administrator”.
Run the DVD to iPhone Converter load your DVD by clicking “Load DVD” button, you also can load IFO file from your hard drive by clicking “Load IFO File” button.
Click drop down list and select iPhone supported format (AAC, MP3, WAV, etc.) you want:Convert DVD Movie to iPhone - format

You can also customize the sample rate, bit rate and other parameters of your iPhone ringtone by click “setting”

Convert DVD movie to iPhone - settings

To extract a clip from DVD to iPhone ringtone, you can click button “trim”, set the start time and end time.

Convert DVD movie to iPhone - trim

Then click “Start” to extract iPhone ringtone from you DVD, Done.

Part 2 How to make iPhone ringtone from videos and songs?
Start Aiseesoft iPhone Movie Converter, then click “Add” button to load video file which you want to extract iPhone ringtone from(You can also load audio file to convert music to iPhone ringtone).

iPhone Movie Converter


Click drop down list and select iPhone supported format (AAC, MP3, WAV, etc.) you want:

iPhone Movie Converter - output

The operation is similar as extracting iPhone audio from DVD with DVD to iPhone Converter, set sample rate, bit rate and other parameters of your iPhone ringtone by click “setting”

Most users’ iPhone ringtone are always short, so you may want to convert a clip from movie to set as ringtone. Click button “trim” to set the start and end point of your iPhone ringtone.

Then click “Start” to convert a clip to iPhone ringtone from your movies or songs.

Next part: How to sync/ put ringtone to iPhone/iPhone 3G without iTunes

Free Trial: Download Aiseesoft DVD to iPhone Suite

How to Convert video and DVD to DV for DVD Studio Pro, Final Cut Pro, iMovie

This is a tutorial on how to convert video and DVD to DV for DVD Studio Pro, Final Cut Pro, iMovie.
Here are 2 parts:
Part 1, How to convert DVD to DV on Mac?
Part 2, How to convert videos such FLV to DVD on Mac?

Part 1, How to convert DVD to DV on Mac?
You need the following two software:
Aiseesoft DVD Ripper for Mac
MPEG Streamclip
Step 1, Rip DVD to formats that are compatible with MPEG Streamclip
Many free Mac DVD Rippers don't support ripping encrypted DVD. We recommend you Aiseesoft DVD Ripper for Mac (Intel Version, PPC Version) which can rip encrypted DVD to many other video formats such as MP4, FLV, MOV etc.
MPEG Streamclip Supports the following input formats: MPEG, VOB, PS, M2P, MOD, VRO, DAT, MOV, DV, AVI, MP4, TS, M2T, MMV, REC, VID, AUD, AVR, VDR, PVR, TP0, TOD, M2V, M1V, MPV, AIFF, M1A, MP2, MPA, AC3.
You need to use DVD Ripper for Mac to rip DVD to any video formats such as MP4, MOV compatible with MPEG Streamclip. After conversion, you can find the converted files in the output folder.
Tutorial on how to use DVD Ripper for Mac

Step 2, use MPEG Streamclip to convert videos to DV
Click 'File'>'Open Flies' to Open the converted files in the output folder.
Click 'File'>'Export to DV' to convert videos to DV.
That’s all.
Now you have converted DVD to DV on Mac. Then you can put the DV to DVD Studio Pro, Final Cut Pro, iMovie to edit.

MPEG Streamclip - convert videos to DV

Part 2, How to convert videos such as FLV to DV on Mac?
Software you need:
Aiseesoft Video Converter for Mac
MPEG Streamclip
Step 1, Convert videos to the formats compatible with MPEG Streamclip (Optional)
MPEG Streamclip Supports input formats: MPEG, VOB, PS, M2P, MOD, VRO, DAT, MOV, DV, AVI, MP4, TS, M2T, MMV, REC, VID, AUD, AVR, VDR, PVR, TP0, TOD, M2V, M1V, MPV, AIFF, M1A, MP2, MPA, AC3.
If your videos such as FLV, 3GP, 3G2, WMV, XVID are not the above formats, you need to use Video Converter for Mac to convert your videos to MPEG Streamclip format.
Here is a tutorial on how to use Video Converter for Mac.
If your videos are compatible with MPEG Streamclip, please go to step 2.

Step 2, use MPEG Streamclip to convert videos to DV on Mac
Click “File”>”Open Flies” to Open the converted files in the output folder.
Click “File”>”Export to DV” to convert videos to DV.
That’s all. Now you are succeed in convert DVD to DV on Mac.
Then you can put the DV to DVD Studio Pro, Final Cut Pro, iMovie to edit.

2010年8月15日星期日

You’re Charging It Wrong

After 27 overheating incidents, six fires and four customers with minor burns, Apple Japan has offered replacements for first-generation iPod nano mp3 players that overheat while charging. The Japanese government has been highly critical of the company for its delay in confirming and reporting these and 34 other “non-serious” cases of overheating. Apple reports that the defect can be traced to a specific battery supplier.

Google Pays Real Money for Virtual-Goods Payment Processor

As tipped by TechCrunch earlier this week, Google has snapped up Jambool, maker of the Social Gold platform, which allows social app and game developers to manage and monetize their virtual economies. The price wasn’t disclosed, but TechCrunch’s sources pegged it at $55 million plus $15 million to $20 million more in an earnout. The purchase comes just a week after Google confirmed it had bought social app and game outfit Slide.

2010年8月13日星期五

Waiting for Godot: Apple’s Fall Event Is Definitely Happening, but Exactly When and What?

Oh, it’s coming.

According to several sources, and as has been widely expected, Apple will once again be holding its annual autumn special event, possibly closer to mid-September this time.

Apple (AAPL), which has had a fall hello-there confab every year since 2005, waited until August 31 last year to announce its “Let’s Rock” event on September 9 at the Yerba Buena Center for the Arts Theater in San Francisco.

There, CEO Steve Jobs, in his first public appearance since his medical leave of absence, let loose with a bunch of mostly music-focused features.

That included introducing iTunes 9, as well as home sharing, Genius mixes and some updates of the iPod.

“I’m vertical, back at Apple and loving every day of it,” said Jobs last year.

Well, he’s still standing, but he has definitely not stood still, launching both the iPad and the iPhone 4 since then.

Still, because it is Apple, speculation is running high about what the iconic tech company will unveil next.

And most of it centers around the blinging of the iPod touch to bring it into line with many of the features on the iPhone.

That is likely to include front- and rear-facing cameras, which would allow the device to use FaceTime, Apple video-calling software that works over Wi-Fi.

With Jobs promising Apple would release the FaceTime protocol as a open industry standard, combined with the company’s ongoing skirmish with Google (GOOG) in the smartphone space, wouldn’t it be nice to have all those iPods turn into phones?

There could also be an A4 processor in the iPod, which will give it even more oomph.

Other rumors run the gamut, such as a new cloud-based, streamy rethink of Apple TV (possible and exciting), a smaller iPad (silly and unlikely) and a streaming music service (useful and most likely).

Or, because it is Apple, something else.

Oh, one more thing: It goes without saying that Apple PR majordomos passed on my perfectly reasonable request for the entire detailed schedule, including slides, for any special event in September.

2010年8月11日星期三

How to make iPhone Ringtones on Mac and Windows for FREE

I have many iPhone Ringtones on my iPhone, and I change them once one day. But I don’t buy them online. I just make iPhone Ringtones myself by Ringtone Maker Shareware. Actually, iPhone Ringtone maker is m4r Ringtone Maker, such as mp3 Ringtone Converter, WMA Ringtone Converter and WAV Ringtone Converter. There are also iPhone Ringtone Converter for Mac or iPhone Ringtone Creator Mac.

Here I will share how to make iPhone ringtones on Windows and Mac.
For Windows:
Firstly, you need download iPhone Ringtone Maker.

iPhone Ringtone Maker

Step 1: Load Music
Click “Browse” on the right side of “Input File” to find your music that you want to make as your iPhone ringtone and click “Open” to load it into iPhone Ringtone shareware.
Step 2: Choose iPhone Ringtones
1. Drag your “Start Slider” to the beginning of the “Slider Bar” and “End Slider” to the end, then Listen iPhone Ringtone 
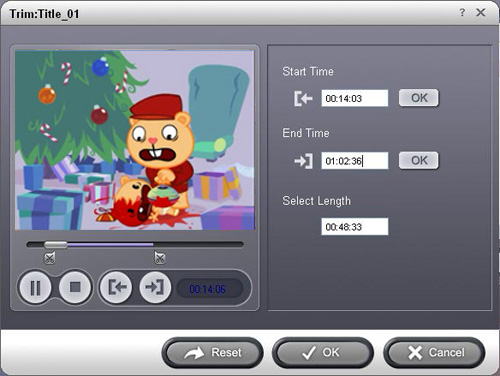
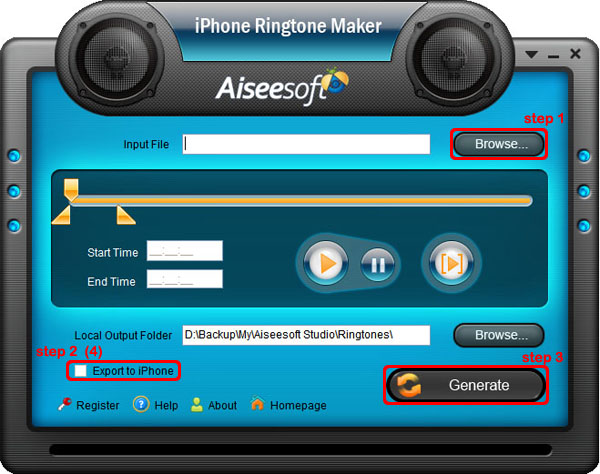
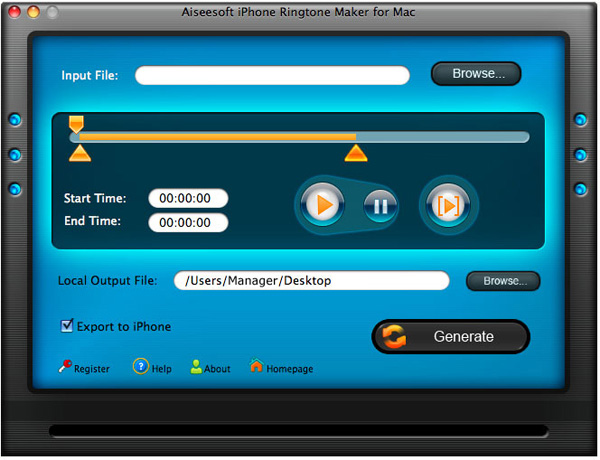
to listen your whole audio file.>br/>2. a. Drag the “Start Slider” to find where is the beginning of your ringtone and Drag “End Slider” to make an End of it.
b. Type the exact “Start Time” and “End Time” in the box to choose your ringtone.
3. ClickPre-listen iPhone Ringtoneto pre-listen your ringtone.
4. If you want to put your ringtone directly on your iPhone, just plug your iPhone to your computer and check “Export to iPhone” (4). If you just want to put it on your computer, click “Browse” on the right of “Local Output Folder” to find a place to put it.
Step 3: Generate iPhone Ringtones After you have done the 3 steps, just click “Generate” to make your iPhone ringtones.

For Mac:
If you are a Mac user, you need to find iPhone Ringtone Converter for Mac or iPhone Ringtone Maker for Mac.
Here I have one for you, just download this iPhone Ringtone Maker for Mac.

iPhone Ringtone Maker for Mac
The process of making your own iPhone ringtone on Mac is the same as on Windows.
Hope you enjoy this DIY process.

2010年8月10日星期二

iPAQ converter - convert mpeg mp4 wmv avi to ipaq, rip dvd to ipaq

The tutorial includes two parts. The part 1 will show you how to convert mpeg mp4 wmv flv 3gp avi to iPAQ video step by step with Aiseesoft Total Video Converter. And the part 2 will show you how to convert dvd movie to iPAQ video step by step with Aiseesoft DVD Ripper. The detailed steps are as follows:

Part1. how to convert mpeg mp4 wmv flv 3gp avi to iPAQ video?
Aiseesoft Total Video Converter is a powerful iPAQ video converter which can convert various video formats including AVI, Divx, XviD, WMV, MPEG, MPG, FLV(YouTube video), RM, RMVB, TOD, MOD, ASF, H.264, etc to iPAQ video. And it is a video joiner, and video editor for you to convert video files to the formats you want, so you can enjoy you movie on all common digital players like iPod, Zune, iPhone, Apple TV, PSP, Xbox 360, PS3, Archos, iRiver, Creative Zen, PMP, Smart Phone, Pocket PC, PDA, Mobile Phone, etc.

Here's the tutorial about how to convert mpeg mp4 wmv flv 3gp avi to iPAQ video with Aiseesoft Total Video Converter

Step1 Free to Download Aiseesoft Total Video Converter and install it.

Step2 Click the "Add File" button to import your videos. If you experience any problems adding videos by directly clicking the "Add File" button, you can click "File -> Add File" to add the video files you want to convert from your computer.

Aiseesoft Total Video Converter

Step3 This software can convert video to various video formats for PMP, Xbox 360, iPod, PSP, Zune, cell phone, etc. Click the "Profile" drop-down list to select the format "HP iPAQ Video(*.wmv)"

Total Video Converter - profile

Step4 If you want to customize the output quality, click the "Settings" button to open the Settings panel, where you can set resolution, frame rate, video bit rate, audio bit rate, sample, etc.

Total Video Converter - settings

Step5 Click the "Browse" button to specify a location on your computer to save the converted movie. If you want to open the output folder, you can just click the button "Open Folder". If you want to merge the added video files into one file, check the option "Merge into one file". By default, the the merged file is named after the first selected file.

Step6 When you get ready to convert the added video files, click the “Start” button to start conversion.

Part 2. how to convert dvd movie to iPAQ video?
Aiseesoft DVD Ripper is all-in-one, super fast DVD ripper software. The best DVD ripper can rip DVD movies to all popular video and audio formats. And it let you easily copy DVD movie to iPAQ video, iPod Video, Zune, iPhone, Apple TV, PSP, Xbox 360, PS3, Archos, iRiver, Creative Zen, PMP, MP4/MP3 Player, Smart Phone, Pocket PC, PDA, Mobile Phone, etc.

Step1. Download Aiseesoft DVD Ripper and install it.

Step2. Insert your DVD disc into your DVD-Rom, then run the software, click "Load DVD" button and add the DVD file. You can also add DVD/IFO from your hard disk by clicking "Load IFO File".

DVD Ripper

Step3. This software can convert DVD to various video formats such as MPEG-4, AVI, WMV, FLV, 3GP, VOB, etc. Click the "Profile" drop-down list to select the format "HP iPAQ Video(*.wmv)".

DVD Ripper - profile

If you want to customize the output video, you can click the "Settings" button next to the format field to open the Settings window and set video resolution, frame rate, bit rate, encoder, etc. See the figure below:

DVD Ripper - settings

Step4. Select Subtitle and Audio
Regular DVD movies usually have several subtitles such as English, French, German, etc. You can select one you prefer. You can also delete the subtitle by selecting "No Subtitle", Selecting Audio is the same.

Step5. After the above steps, click "Start" to start conversion.

2010年8月8日星期日

How to convert MTS/M2TS video

MTS or M2TS format is the equivalent of h.264 or MPEG-4 AVC. It is a fairly new High Definition codec that provides greater compression than the regular MP4 and others. Those two High Definition format always be used on HD Camcorder, such as Sony, Canon or Panasonic.

As they are HD video, most of our video editor such as windows movie maker can not edit it directly. And also you can not upload it to youtube.com and share with your friends.

So you need to convert them into normal video format, such as wmv, mp4, avi and so on.

Here I know a really powerful MTS Converter and M2TS Converter
And the process of operation is really easy and fast.

Part 1: How to convert MTS video
Step 1: Load Video
Click "Add File" to load the video that you want.

MTS converter

Step 2: Choose Your Output Profile and Settings
From "Profile" drop-down list you can choose your output profile according to your need.
For example, if you have a iPod and you want to convert video for it, you need to choose "iPod" from the profile list and then it also provides the second chance to specify your iPod generation.
You can also click "setting" adjust the settings of your output video, such as "video/audio encoder", "Video/audio Bitrate", "Channels", "Resolution" and so on..

Step 3: Conversion
After you have done all the steps above you can click "Start" button to start your conversion.

Part 2: How to convert M2TS video

M2TS converter

Step 1: Add File
Load your M2TS video.

Step 2: Choose Profile and Settings
Select your output profile according your need and adjust the settings of your output video if you like.
(the default setting works well)

Step 3: Start Conversion
Click "Start" to begin your conversion.

Here I also recommend you a really nice HD Video Converter, which can convert HD TS, HD MTS, HD M2TS, HD MPEG, HD WMV, HD MPG, HD MP4, QuickTime HD MOV, HD H.264, HD RM video, etc

Why the San Fran Chronicle Is Running Demand Media Content

Two Hearst newspapers’ websites have gone live with new sections from Demand Media, one of the content-generation companies that tap thousands of freelancers to generate countless articles.

Some observers argue that these so-called content farms are winning web traffic and ad revenue away from traditional publishers without matching the quality that traditional newsrooms provide.

Read the rest of this post on the original site

2010年8月6日星期五

Android Is Outselling the iPhone and the BlackBerry Too?

We heard in May that Android is outselling the iPhone in the United States. Now it’s outselling the BlackBerry as well.

Research outfit NPD says handsets running Google’s (GOOG) mobile OS accounted for 33 percent of all smartphones purchased in the second quarter in the States, compared with 28 percent for the RIM’s (RIMM) BlackBerry and 22 percent for Apple’s (AAPL) iPhone (Caveat: NPD’s numbers do not include corporate/enterprise mobile phone purchases and include just seven days of iPhone 4 sales). Notably, the BlackBerry’s Q2 market share was down 8 percent from the prior quarter, while Android’s was up 6 percent and the iPhone’s remained relatively flat. So the gains here–which were driven by a handful of slick Android phones like the Droid, EVO 4G and Hero–came largely at the BlackBerry’s expense.

Another unfortunate data point for RIM, which has been gathering quite a few of them lately. Just a few days ago Nielsen released a survey showing that 50 percent of current BlackBerry owners would rather have an iPhone or Android device.

2010年8月4日星期三

EMusic Gets a New CEO, Promises Cloud-Based Locker Service For 2011

Digital music service eMusic has a new CEO: Digital veteran Adam Klein.

Klein, whose resume includes stops at MTV, EMI and Video Egg, replaces Danny Stein. Stein runs eMusic’s owner, JDS Capital Managment/Dimensional Associates, and has been running eMusic since former CEO David Pakman left for a venture capital gig nearly two years ago. Dimensional, meanwhile, just swallowed up digital distributor The Orchard.

So now that we’ve got that cleared up: What’s the plan at eMusic?

The service is in a weird middle ground between the “buy a song for a buck” model that Apple (AAPL) and Amazon (AMZN) push, and the “$10-a-month for all the streaming music you can eat, wherever you want to eat it” model that Rhapsody, MOG, Rdio and, maybe one day, Spotify are pushing.

Instead, eMusic’s core offering is a $12 a month subscription service–it prefers the term “club”–that gives users up to 24 MP3 downloads a month, which they can keep forever.

For a long time, the service targeted niche music lovers, primarily indie aficionados, but in the past couple of years it has added back catalog from two majors: Warner Music Group (WMG) and Sony (SNE). So users can now download Bob Dylan and Led Zeppelin along with MGMT.

That’s an interesting approach, and there is a business there: There are 375,000 subscribers, down from 400,000 a couple years ago, but still enough to generate some $65 million a year.

But Stein and Klein think they can expand the business again with a redesigned site, set to launch in Q4, that will be more appealing to non-subscribers and give them more incentive to stick around and eventually sign up. We’ll check back in later and see how they’re doing.

UPDATE: I must have fallen asleep right before Stein and Klein told me about their plans to launch a cloud-based “locker” service, which would let users stream their music no matter where they are, in the near future. As it turns out, those plans are still bit fuzzy–or, at least, eMusic isn’t willing to talk about them in great detail. But the gist is:

  • EMusic says it will let users stream music they’ve bought from the service, and possibly other music they own, to PCs as well as mobile handsets like the iPhone and Google’s (GOOG) Android phones.
  • It says it doesn’t believe it will need to pay the labels an additional royalty to be able to do this. I find it hard to believe that the labels will sign off on this, but we’ll see.
  • It isn’t sure whether it will charge eMusic subscribers an additional fee for the service. If it doesn’t, it could be a very expensive marketing tool, as bandwidth and storage for this kind of thing could be pricey if a lot of folks use it.

Here’s some more info, via an “internal Q&A” the company has provided. Obviously, we’ll be following up on this one…

What are your thoughts on a potential cloud-based iTunes from Apple? How will this affect eMusic’s position in the marketplace?

- We agree that customers want to be able to access their music collections from any device, wherever they are. eMusic has a locker system in development, which we’ve been working on since early this year.

When will the locker be available?

- A preliminary version will be available to select members in late 2010, and we’ll roll it out to our full membership in 2011.

Have you talked with your labels about the service yet? What was their reaction? Aren’t the major labels requesting that Apple pay additional costs for streaming from the locker?

- The labels we’ve talked to are interested in supporting this feature on eMusic because of the nature of our membership service. We have a regular, repeat billing relationship with our members, which iTunes doesn’t have and the locker is a compelling feature that will keep customers happy…which ultimately benefits the content owners.

- We are aggressive stewards of copyright and believe that a locker with the functionality we plan to roll out is covered by the safe harbor for such devices provided by the Audio Home Recording Act. Therefore, an additional royalty is not necessary.

Will customers have to pay extra for the locker?

- We haven’t yet determined if we will charge for the locker. It will depend on a variety of factors.

How much storage for music will be available to eMusic members?

- The exact amount is a function of several variables, and is still undetermined.

Will they be able to store all of their music collections in their locker, even music purchased from other services?

- Yes, they will be able to store and stream their eMusic purchases and, potentially, other music that they own.

How will the locker work with eMusic? Will eMusic tracks automatically be placed in the locker when someone makes a purchase on eMusic, or will they need to upload them independently?

- Purchased tracks will automatically be placed in the locker. Members can then stream or download those songs on demand from an internet connection.

What other features will the locker offer? Will the locker include a music player?

- Members will be able to upload and download purchases to the locker and stream music on demand. eMusic Save for Later lists and ratings will be handled by the locker as well.

Will members be able to access the locker through their mobile phone? Which phones will work with the locker?

- We will also launch eMusic locker applications for most smartphones, including iPhone and Android.

Release on Klein’s hire:

eMUSIC APPOINTS VETERAN MEDIA INDUSTRY AND STRATEGY EXPERT
ADAM KLEIN AS PRESIDENT AND CEO

NEW YORK, Aug. 3, 2010 – eMusic, the digital music club, today announced that it has appointed veteran media industry and strategy expert Adam Klein as President and Chief Executive Officer.

Klein has more than 20 years experience leading strategic, operational and organizational change with both established and technology-led media companies. His background includes work as a strategy and change management consultant as lead partner with Booz Allen Hamilton’s media practice, with Boston Consulting Group and his own company, Klein & Co. He also has held executive roles at AskJeeves.com, as president and chief operating officer; Hasbro, Inc., as executive vice president and president of global marketing; VideoEgg, Inc., as president; EMI Music, as executive vice president of strategy and business development, including Digital P&L; MTV Networks, as executive advisor to the chairman and CEO; and South African Broadcasting Corporation, as executive advisor to the CEO. Currently Klein runs his own consultancy, Media Leader LLC, and is an adjunct professor at Columbia University Journalism School.

Klein will succeed current President and CEO Daniel Stein on August 23. Stein will retain his role as eMusic Chairman and continue to be substantially involved with the company as part of its management team. He also remains CEO of Dimensional Associates and President, JDS Capital.

Stein said, “As eMusic continues to grow its business and provide the best online service for people who are passionate about music, Adam’s leadership in digital media and his successful track record as a business builder is custom-made to take on the CEO role. His decision to join eMusic speaks to his high regard for the platform we have worked so hard to create, and we are now poised to take the company to the next level together.”

“What a great opportunity eMusic represents! It is a well-established platform ready for its next chapter of value and service to its members. I am excited to be a part of eMusic’s ongoing evolution,” said Klein.

2010年8月3日星期二

Put Limewire music, YouTube video on iPod

1. Put music and videos from Limewire to iPod
Limewire is a download tool I assume lot of us use. I often use it to download free music and videos and put them on my iPod. I also often visit Youtube to watch videos and sometimes I download videos from Youtube to put on my iPod.
Search and download songs from Limewire. You may get songs in all sorts of formats, but not all formats are supported by iPod. Usually I select three formats: MP3, AAC and M4A formats that are supported by iPod and can be directly transferred to iPod using iTunes. For the detailed specs info, you can visit http://www.apple.com/iPod/specs.html. After you download the songs, open your iTunes, click "File" from the upper left corner, select "Add file to library", browse your computer hard drive and find the songs downloaded by Limewire, select the songs you prefer, click OK and the songs will be put in your iTunes. Then you can just transfer the songs to your iPod from iTunes.

2.Youtube video to iPod
I often visit Youtube to watch videos and sometimes I download videos from Youtube to put on my iPod. Youtube videos are in FLV formats, so I use a free online FLV converter to do the conversion:
Firstly, go to Youtube and open the page of the video you want to put on your iPod. And you will find the Youtube URL of this video to the right of the playback window. Then copy this URL. See the highlighted area in the figure below:

put Limewire music, YouTube video on iPod

Secondly, go to http://vixy.net/ , paste the copied URL into the URL field of this web page, and select "MP4 for iPod/PSP" from the "Converts to" drop-down list. Then click "Start" below this list to start the conversion. See the highlighted areas below:

put Limewire music, YouTube video on iPod

Finally, after the conversion, this website will provide a download link for you to download the converted MP4 file. When you see the link, you can just download the final file from the link, save the downloaded MP4 file on your computer and use iTunes to sync it on to your iPod.

Recommended Products For you:
DVD to iPod Converter for Mac
It's a specially designed iPod conversion program to Convert DVD to iPod touch, iPod classic, iPod nano, convert DVD to iTunes on Leopard.
DVD to iPod Converter for Windows
It is one of the best conversion programs for PC that can put DVD on iPod touch, iPod classic, iPod nano and so on.

2010年8月1日星期日

How to upload videos to YouTube easily and quickly on Mac

Google has released basic software called Vidnik which is the quickest, simplest way to make movies using the built - in camera on your Macintosh and upload those movies to your YouTube account. You must first sign up for a free YouTube membership to upload videos. You can use Vidnik to create a video diary, or just to quickly record a video comment to attach to an existing YouTube video. Vidnik works with the built-in video cameras on recent Macs, with Firewire video cameras, and with many USB video cameras.

Part 1, use Vidnik to Record video segments using your iSight camera and upload them to YouTube.

upload video to YouTube

To use Vidnik, run the app, then click the record button to start recording. Click it again to stop. Trim to just the golden moments you want to keep, as in the screen shot above. Fill in the required title, description, and so on. Click the upload button. That's it.

Part 2, Use Vidnik to upload videos to youtube
You can drag movies made in other programs onto Vidnik's column of movies, and then click the upload button. And to use another program to do a little post-production, use the Gear menu to show Vidnik's movie file in the Finder. Edit the movie in the other program, and then upload it.Vidnik can only support videos such as: 3GP, AVI, DAT, MOV, MP4, M4A, WAV, AAC. It does not support ASF, FLV, MPEG, RM, WMV, MP3, AC3.
You can use the video converter for Mac to convert your videos to the formats that Vidnik can run.
If you want to upload DVD to TouTube, you need to use DVD ripper to rip DVD to video formats supported by YouTube first. If you are Mac user, you can use this DVD ripper for Mac .

upload DVD to YouTube

How to change iPhone Wallpaper

Here are the easy steps you can take to change iPhone Wallpaper easily.

Make preparations:
Step 1: Find an image that you would like to use as wallpaper from iPhone Wallpaper.
Step 2: Right-click on a PC or control-click on an Apple computer and select "Save As" to save the image to your computer. Save it to your "My Pictures" folder or iPhoto library on a PC or Apple respectively, or wherever you prefer to store your images on your computer as long as you will be able to easily locate it.
Step 3: Connect the iPhone to your computer with the USB cable and wait for iTunes to launch itself automatically. Click on the "Photos" tab in the side panel.
Step 4: Click on the "Sync Photos From:" tab in the "Photos" menu on iTunes and locate the folder where your photos are stored. Select all of the images that you would like to transfer your to iPhone. Click on "Sync" in iTunes to transfer all of the photos to your iPhone.

Change iPhone Wallpaper
Step 1: Tap Settings on the iPhone’s home screen:

Change iPhone Wallpaper

Step 2: Tap the Wallpaper tab:

Wallpaper Tab in iPhone Settings

Several tabs should appear, including one that says Wallpaper. You can tap any of the tabs to select wallpaper for the iPhone. The Wallpaper tab features a collection of pictures supplied by Apple. The other tabs feature pictures you have added to the iPhone, including those taken with the iPhone’s camera.

Wallpaper Selections

Step 3: Tap any picture. A preview screen of the wallpaper will appear, along with the words Move and Scale at the top. You can pinch and reverse pinch the picture to resize. The transparent bars at the top and bottom simulate the bars for the clock and Slide to unlock that will eventually display on top of your wallpaper.
In the example below you can see that the heads of the two peoples will be partially covered by the top bar:

Resize iPhone Wallpaper

To fix, I will reverse pinch to expand the picture, then drag the picture so that their faces appear in the center:

Resize iPhone Wallpaper
Step 4:
Tap Set Wallpaper to finish.
To view your new iPhone wallpaper, put the iPhone to sleep by pressing the sleep button on the top of the iPhone. Then hit the home button to wake the iPhone, and you should see the wallpaper.
Note the position of the clock and Slide to unlock transparent bars. If you’re unhappy with the position of the wallpaper, repeat the steps above.